Personal - Settings
The Settings section allows users to manage their profile details and preferences. It consists of a sidebar that categorizes Settings into two different sections which are Access and Organizational settings.
1. Access
This section contains personal settings related to the user’s individual account and security which includes:
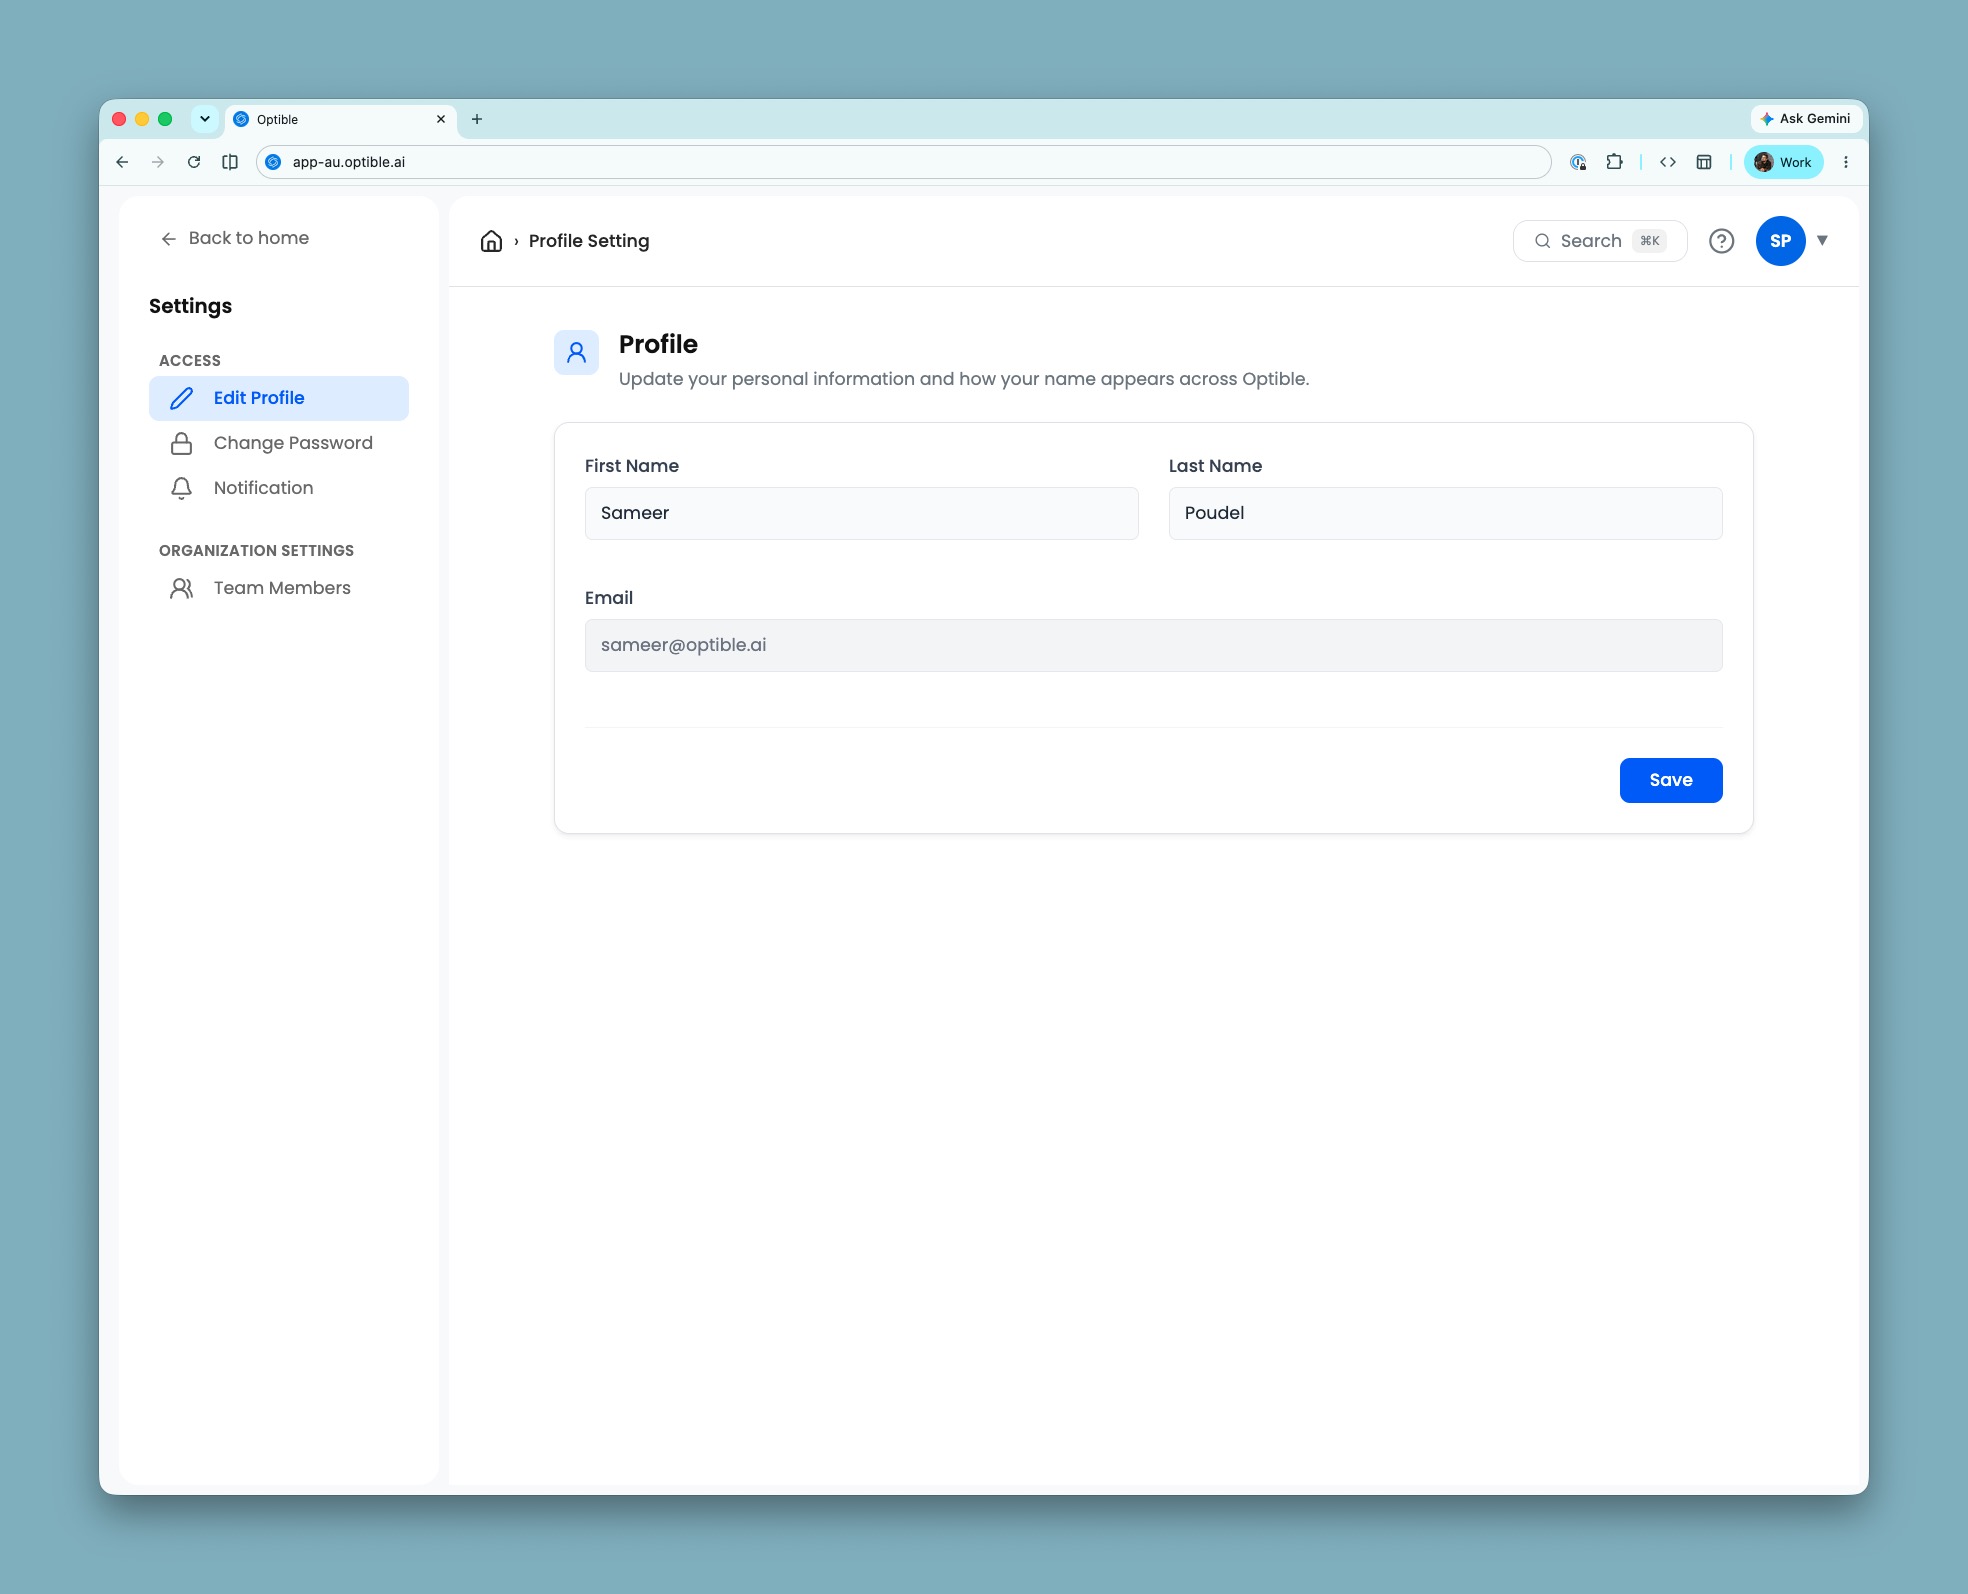
Edit Profile: Allows users to update personal details like Name, Email, and Language. A dropdown menu is provided to select the preferred language. The options include English (default), Vietnamese, and Indonesian.
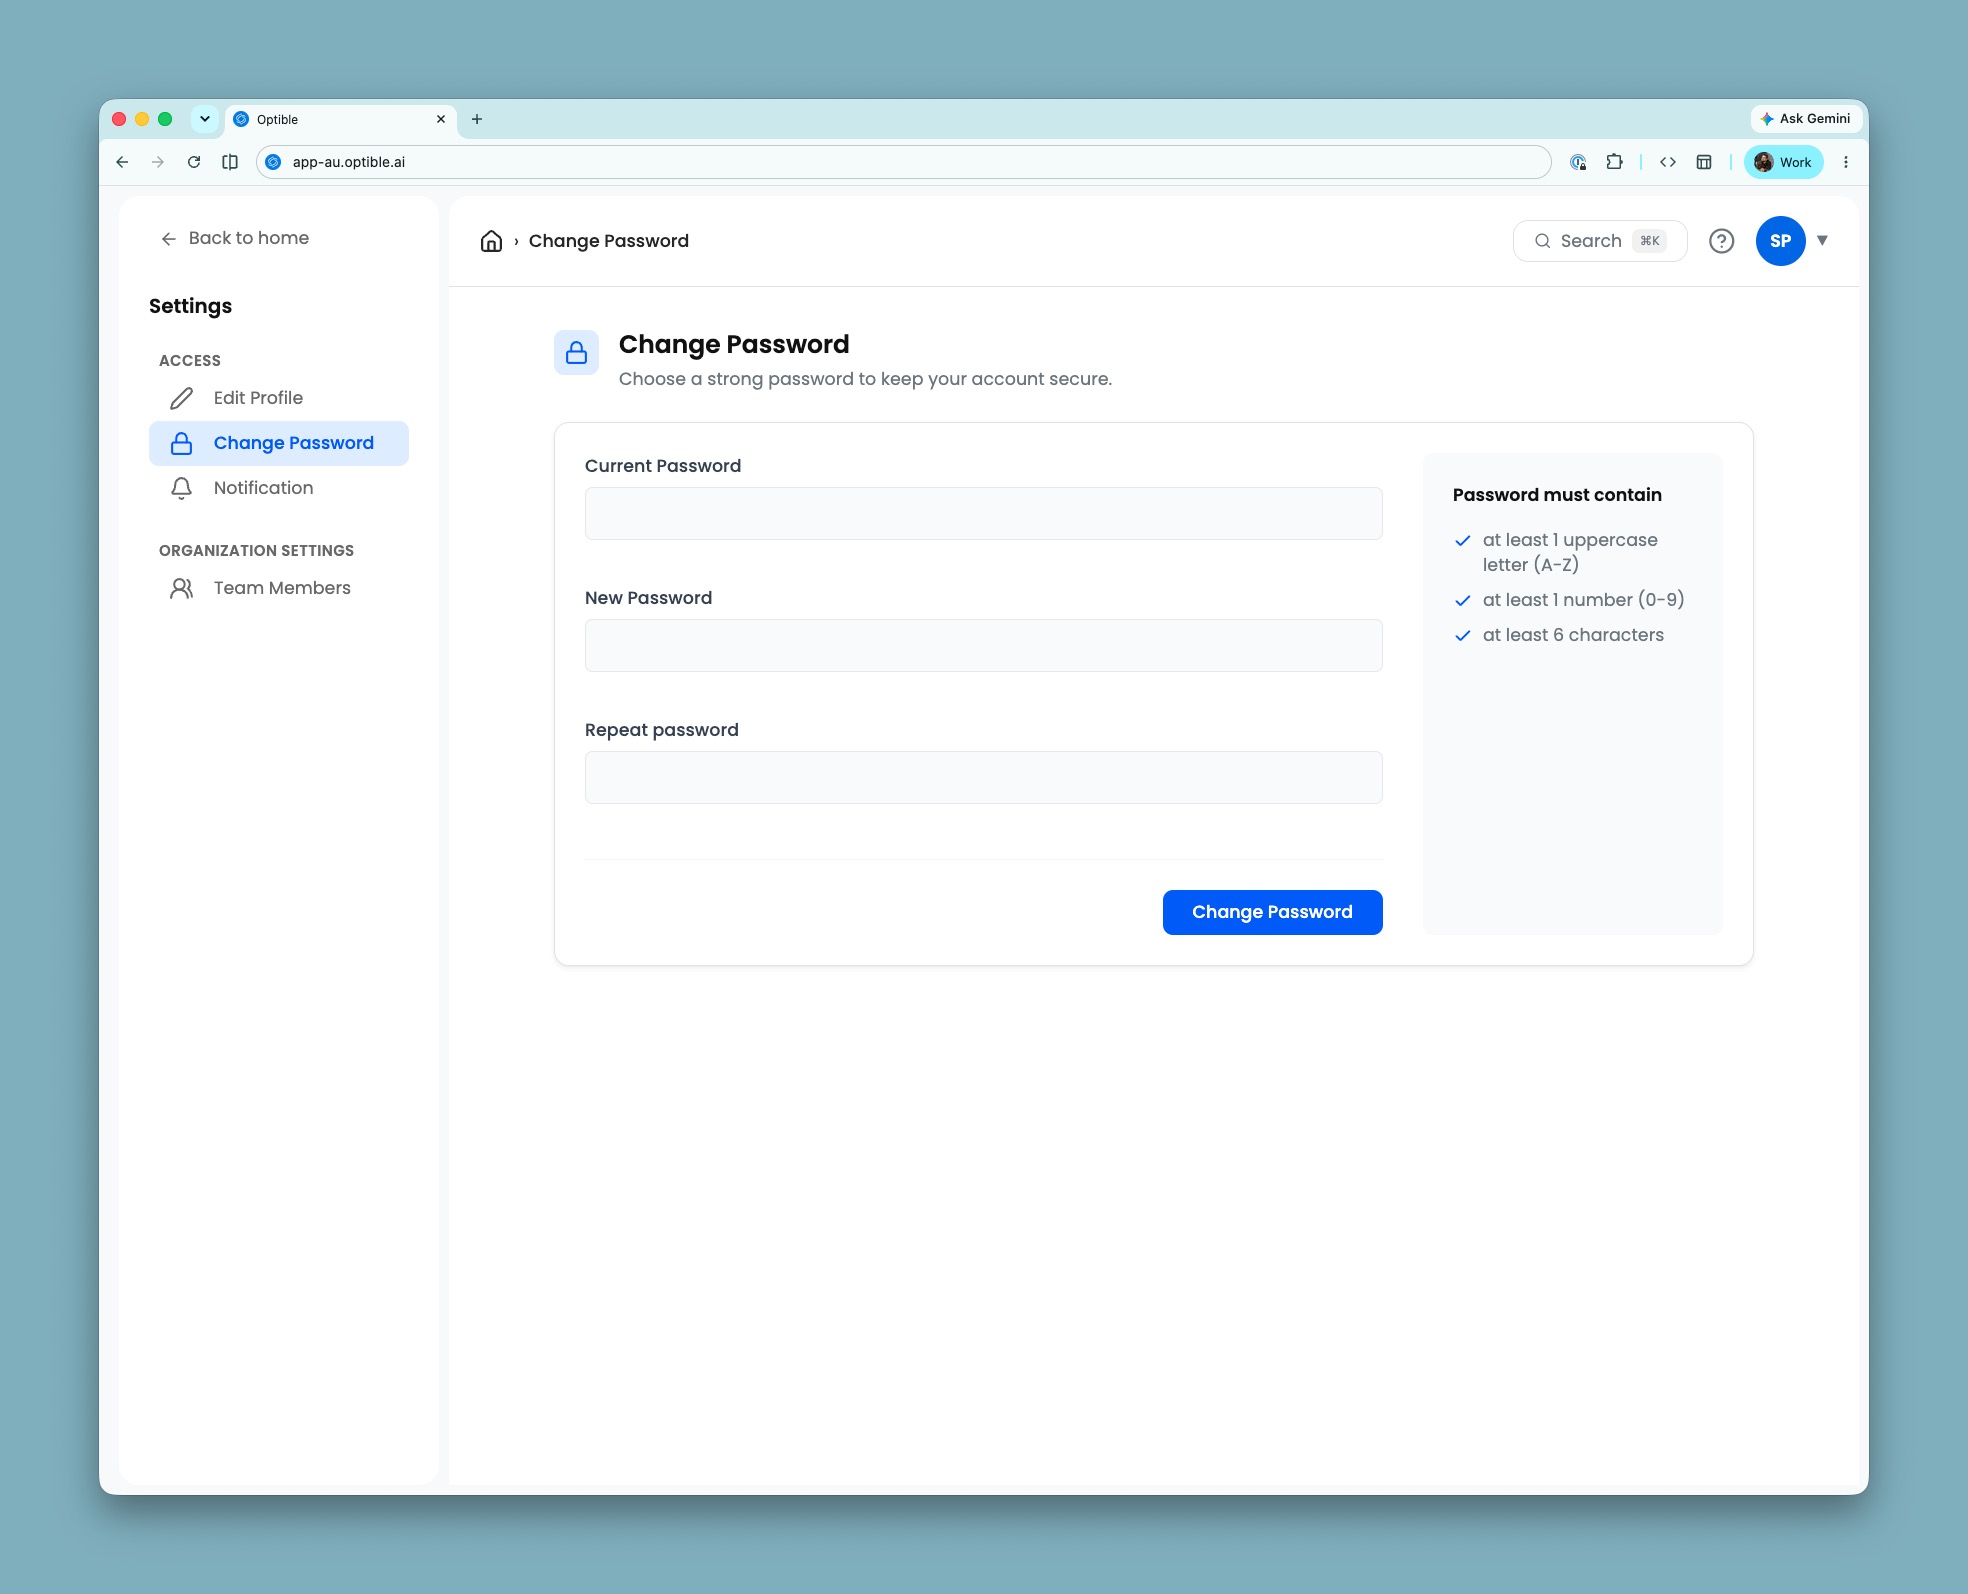
Change Password: Allows users to change their password. The user is prompted to enter their current password, new password and repeating the new password. After entering the details, the user can click on the Change Password button to update their password.
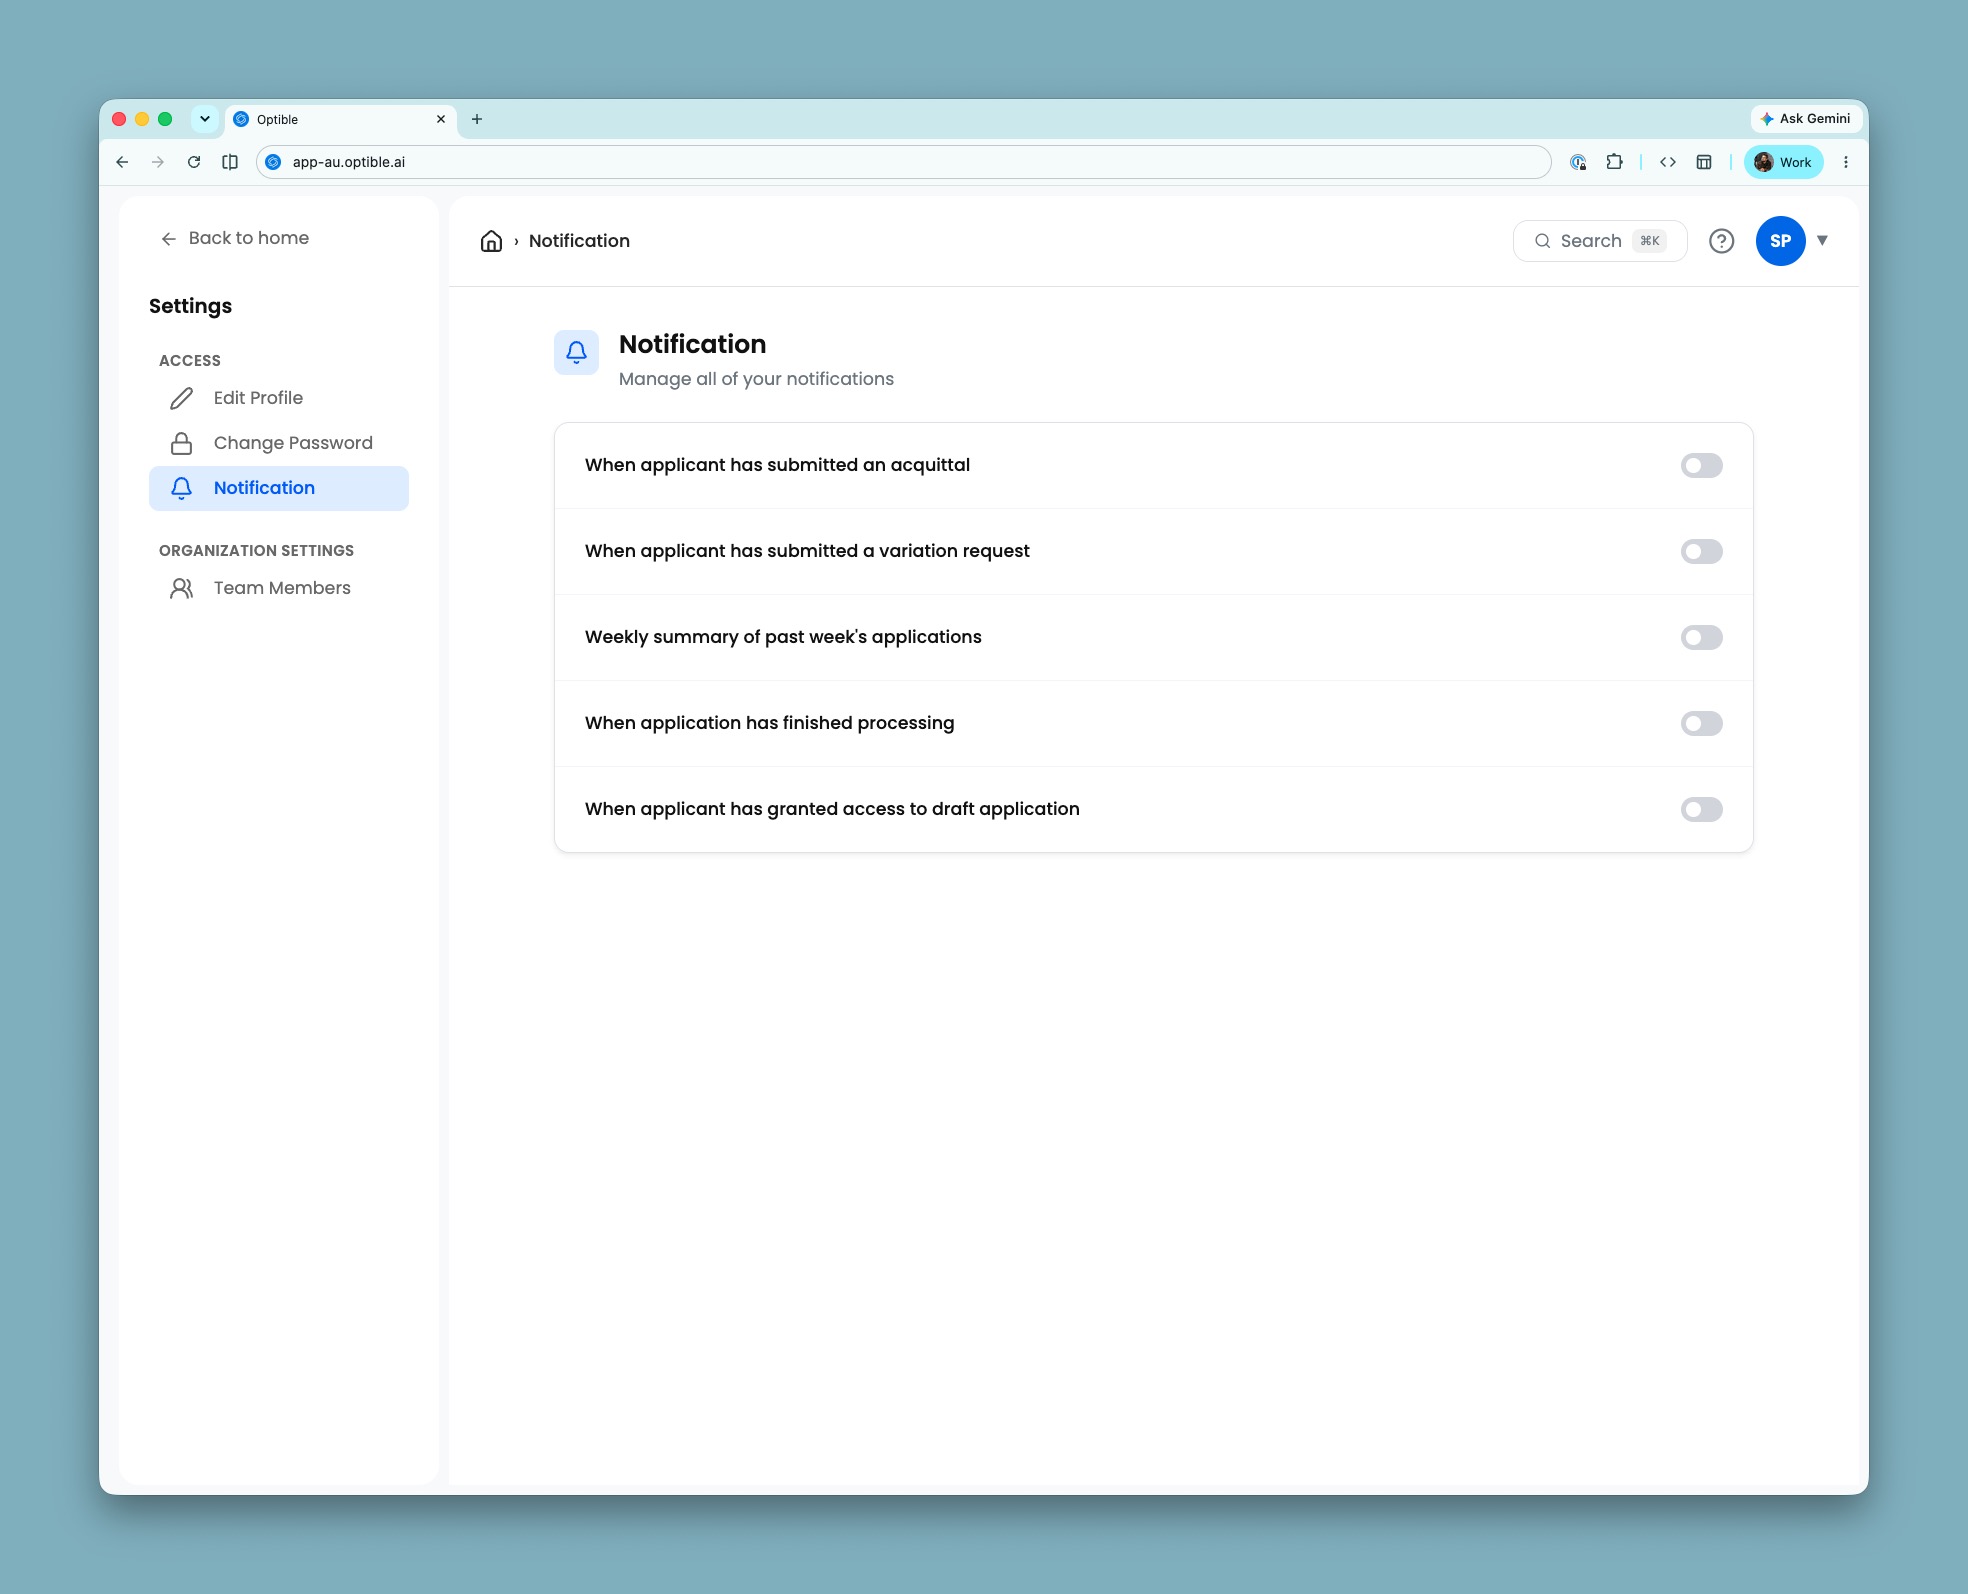
Notification: Allows users to manage their preferences for receiving updates related to applications. Users can enable or disable specific notifications by checking or unchecking the available options. Users can choose to receive notifications when:
2. Organisation Settings
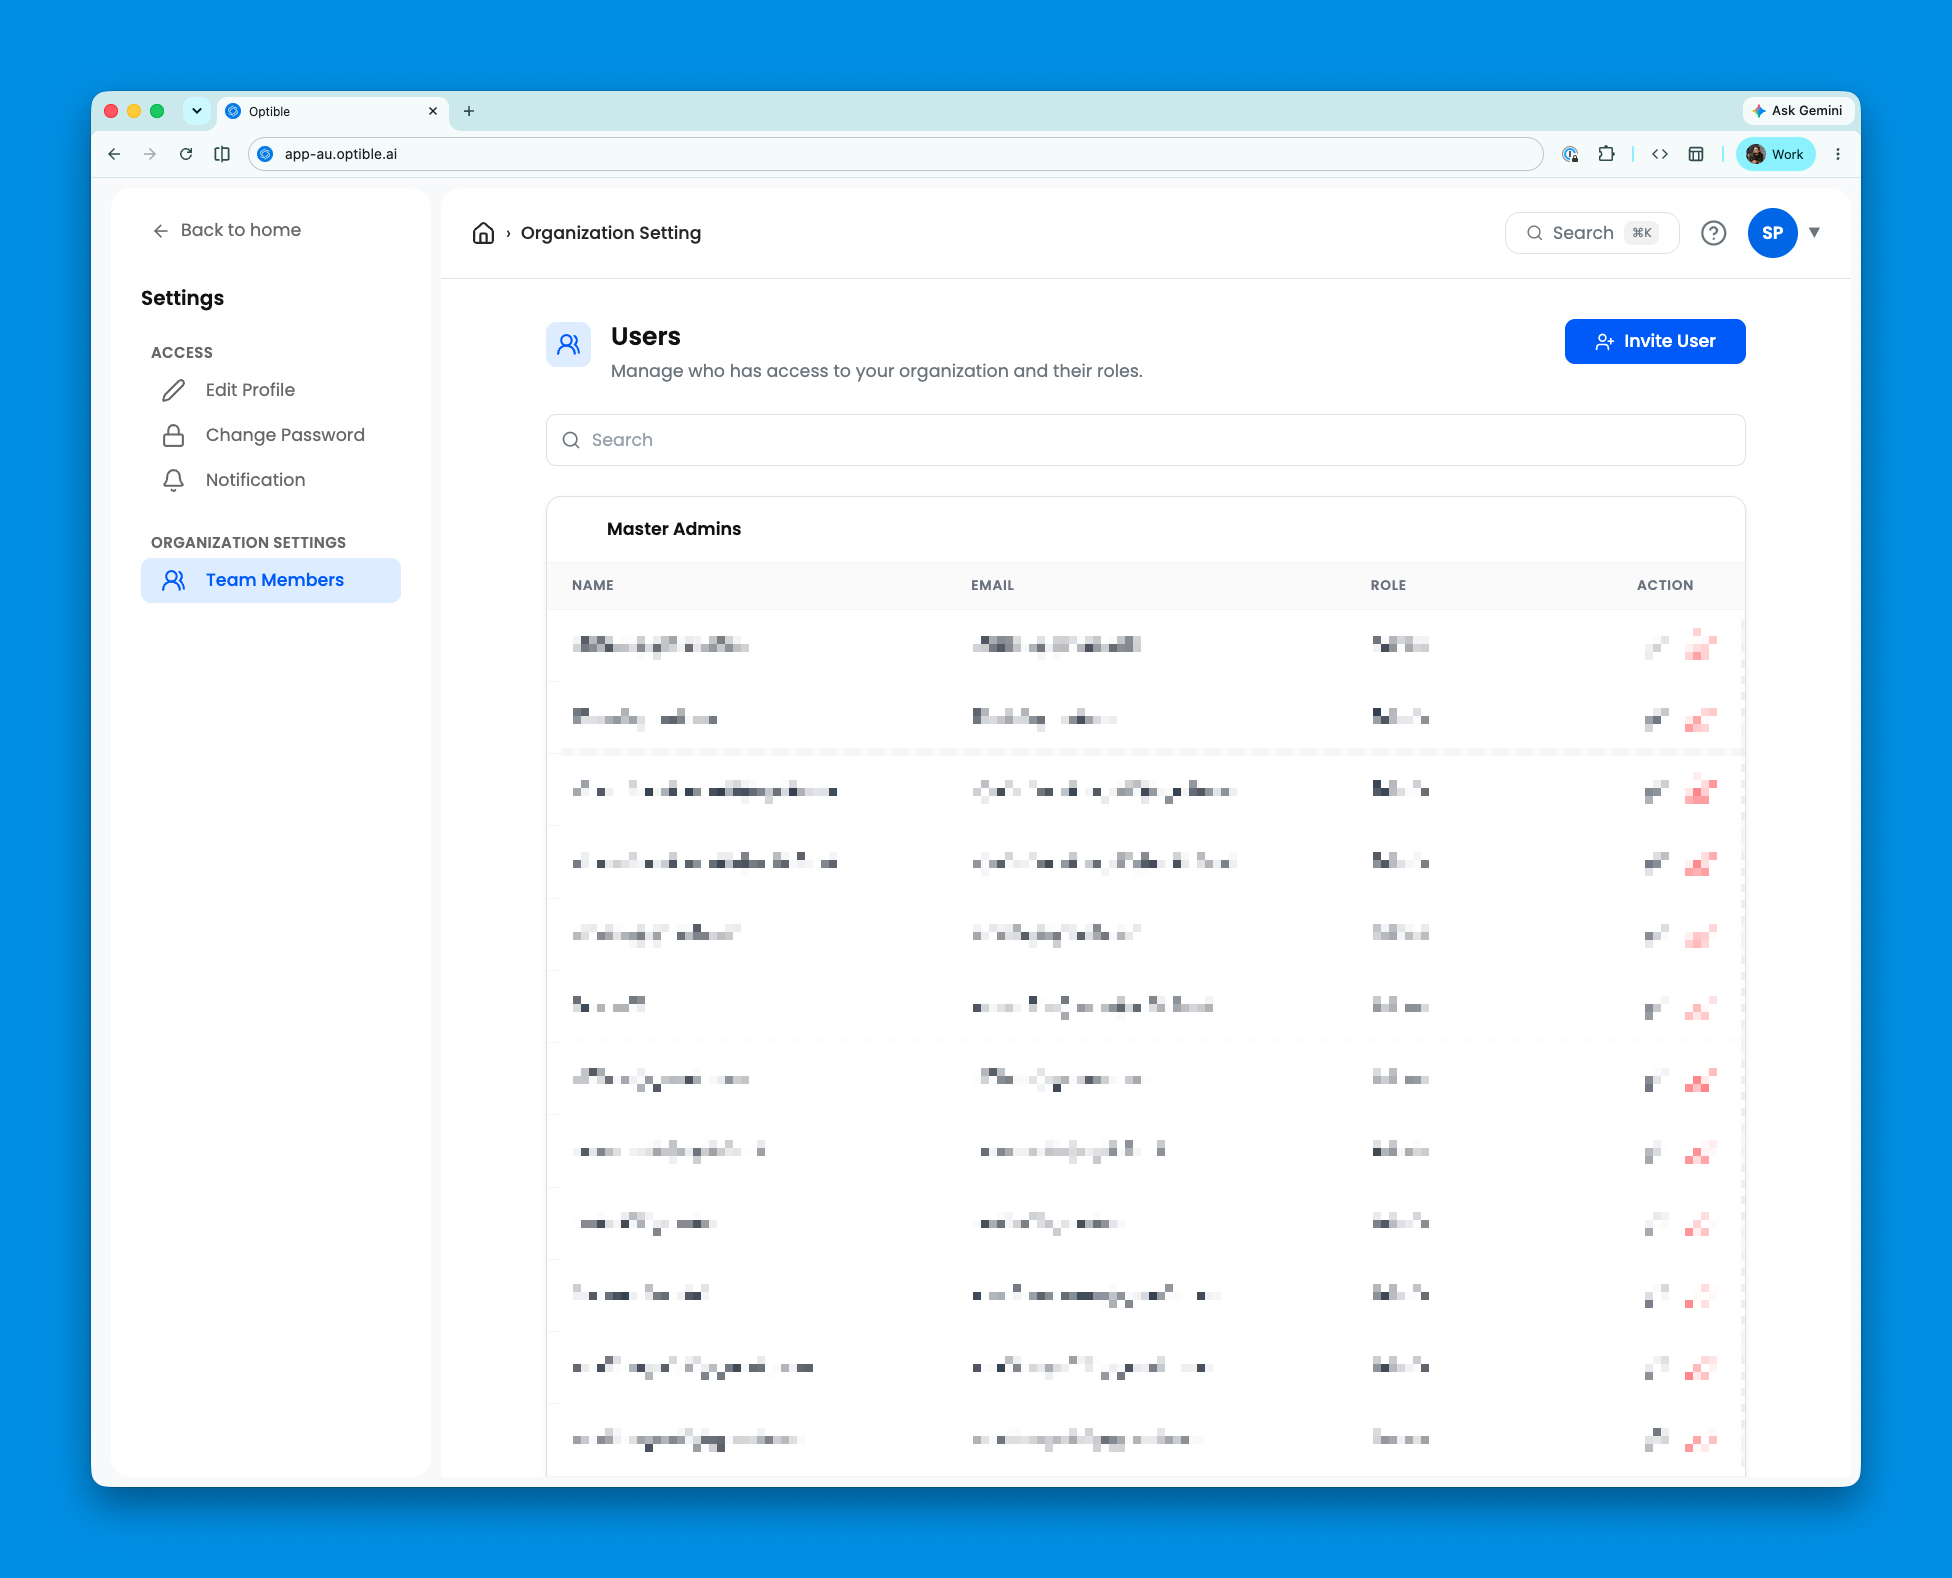
The User Management Page is designed to help administrators manage users within an organisation. It provides a structured view of existing users and allows the addition of new users.
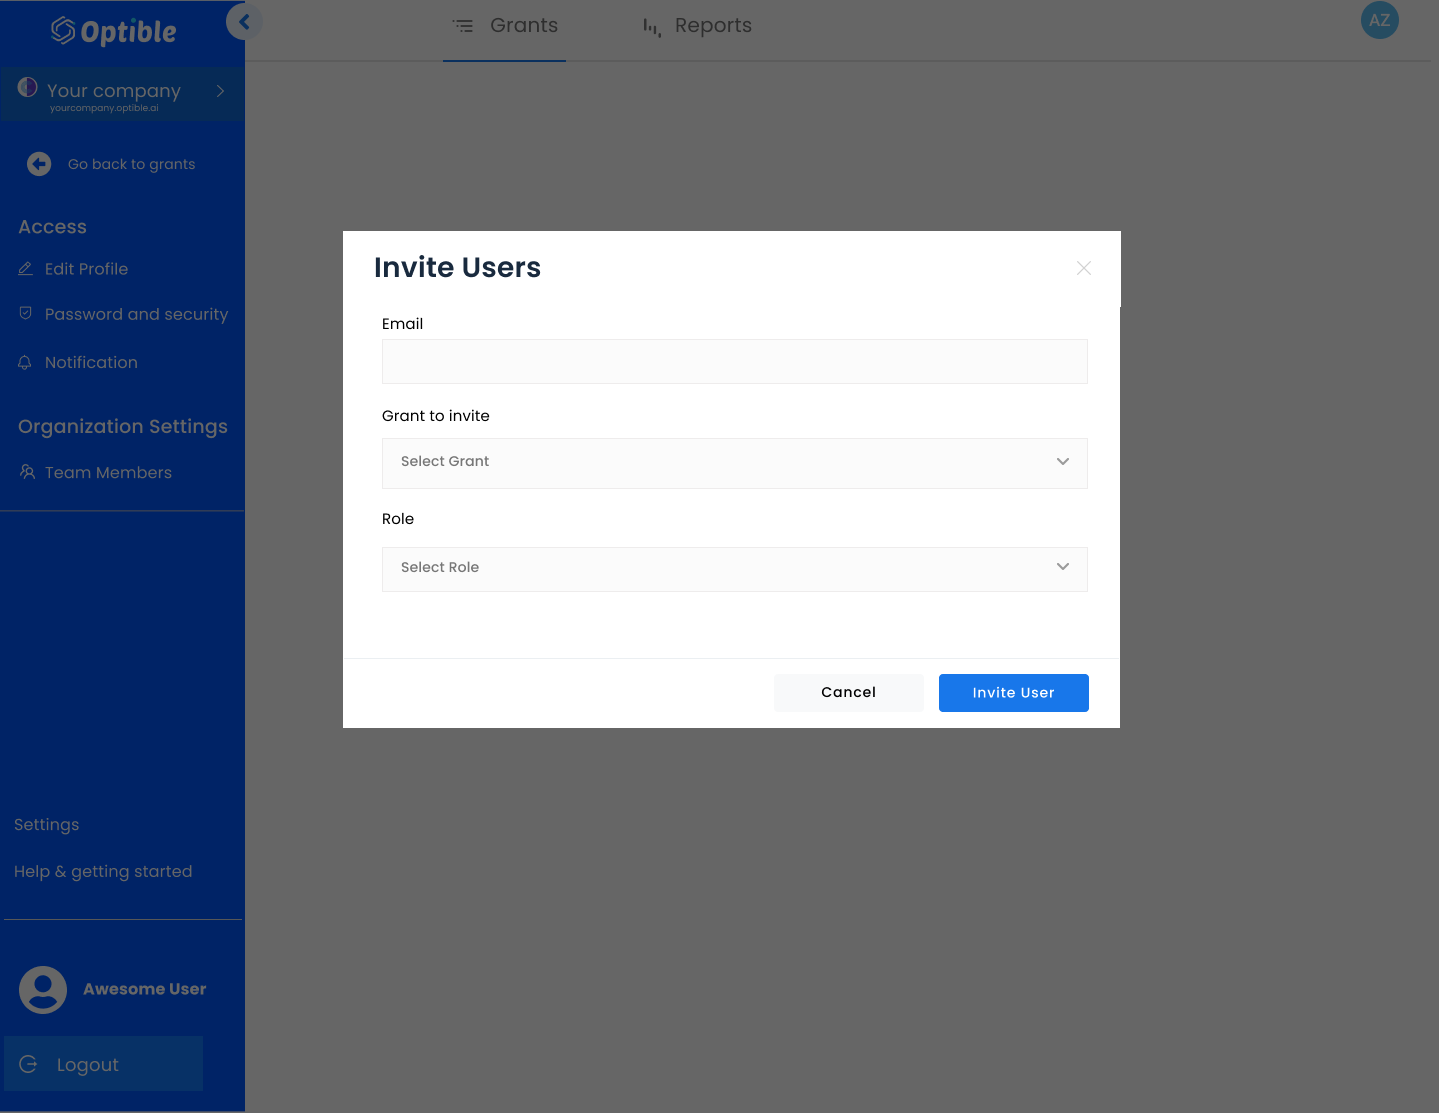
i. Invite Users
The icon next to the Users title allows to invite new users to join the organization.
Upon clicking, it will open a modal that requires users to enter the:
Email Address : To input user's email.
Grant To Invite : A dropdown to associate the user with a specific grant.
Role : A dropdown to assign the user a role. The roles includes Admin, Assessor and Grant Admin.
After entering the details, the user can be invited to join the organization by clicking on the Invite User button.
ii. User List
Displays a list of all users within the organisation.
The user list is structured into distinct sections based on roles and associated grants
Master Admins:
Lists users who have the highest level of administrative access within the organisation.
Users with Master Admin roles are grouped together in a separate table.
Grant Specific User Group:
Users who are not Master Admins are listed under their associated grant along with their assigned role.
The Grant Specific User Group displays following details in the table:
Name: The name of the user.
Email: The email address of the user.
Role: The role assigned to the user.
Action: Icon to remove the user from the organization.