Post-Success Report
This section allows users to manage post-success reports.
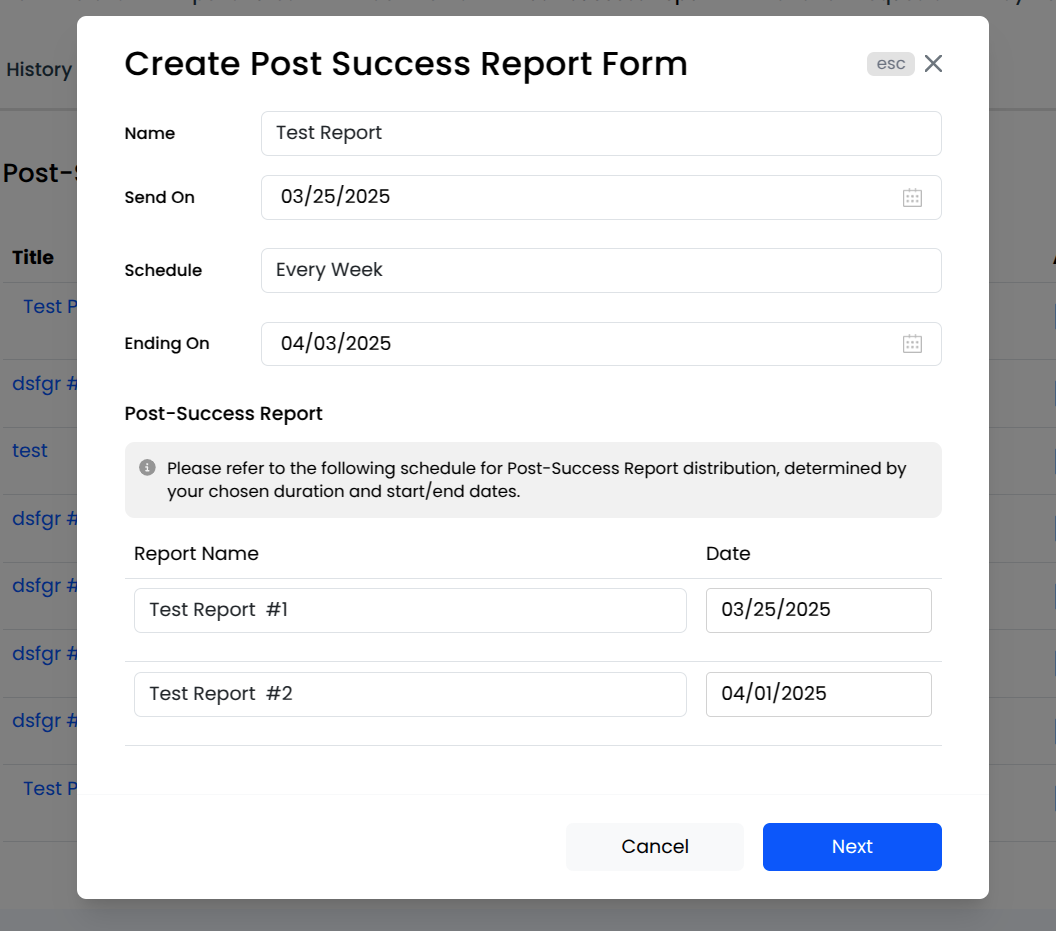
1. Add Post-Success Report
- Click Add post-success report to create a new report.

A modal appears with fields for Name, Send On, Schedule, and Ending On. After adding the end date, the system automatically generates a timeline of scheduled reports.
2. Select or Create a Template
After filling in the required fields, choose an existing template, create a new one, or start from scratch.
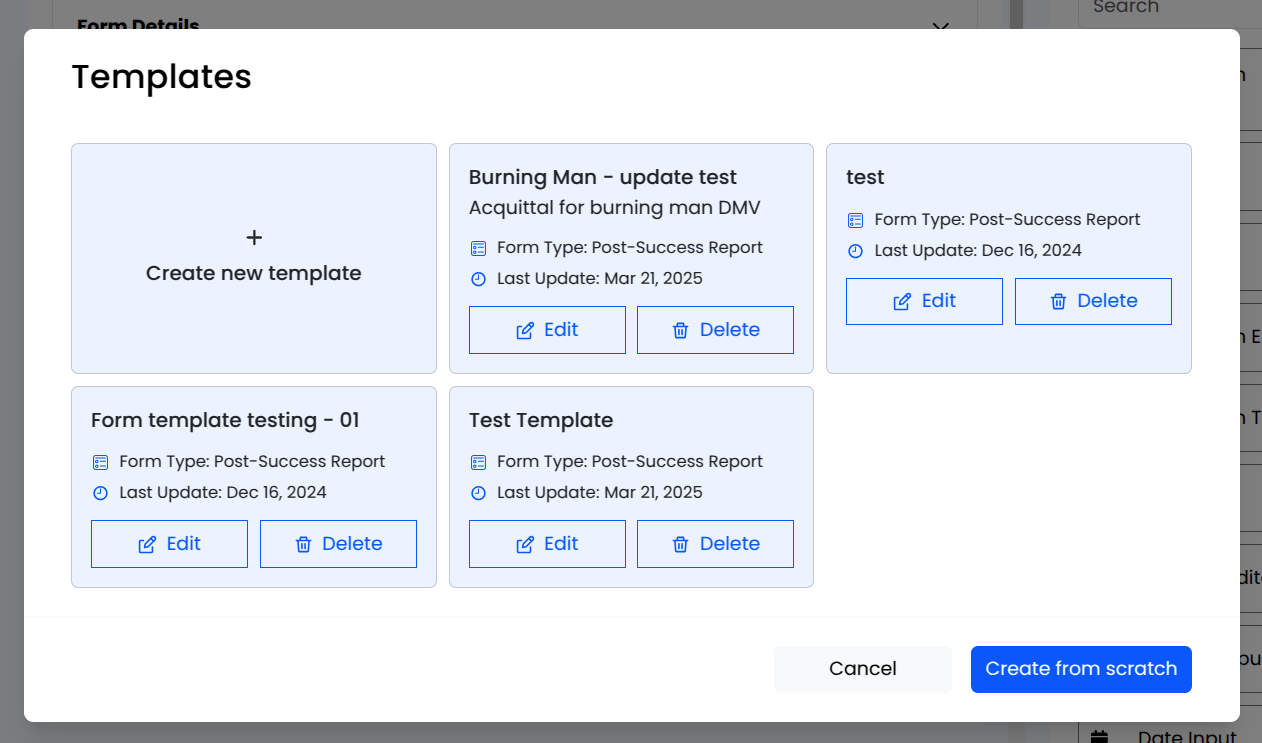
You'll be taken to the Form Builder where you can customise fields, then Save or Save & Proceed.